SageMaker#
RAPIDS can be used in a few ways with AWS SageMaker.
SageMaker AI Notebooks#
To get started head to the SageMaker AI console and create a new SageMaker Notebook Instance.
Choose Applications and IDEs > Notebooks > Create notebook instance.
Select your instance#
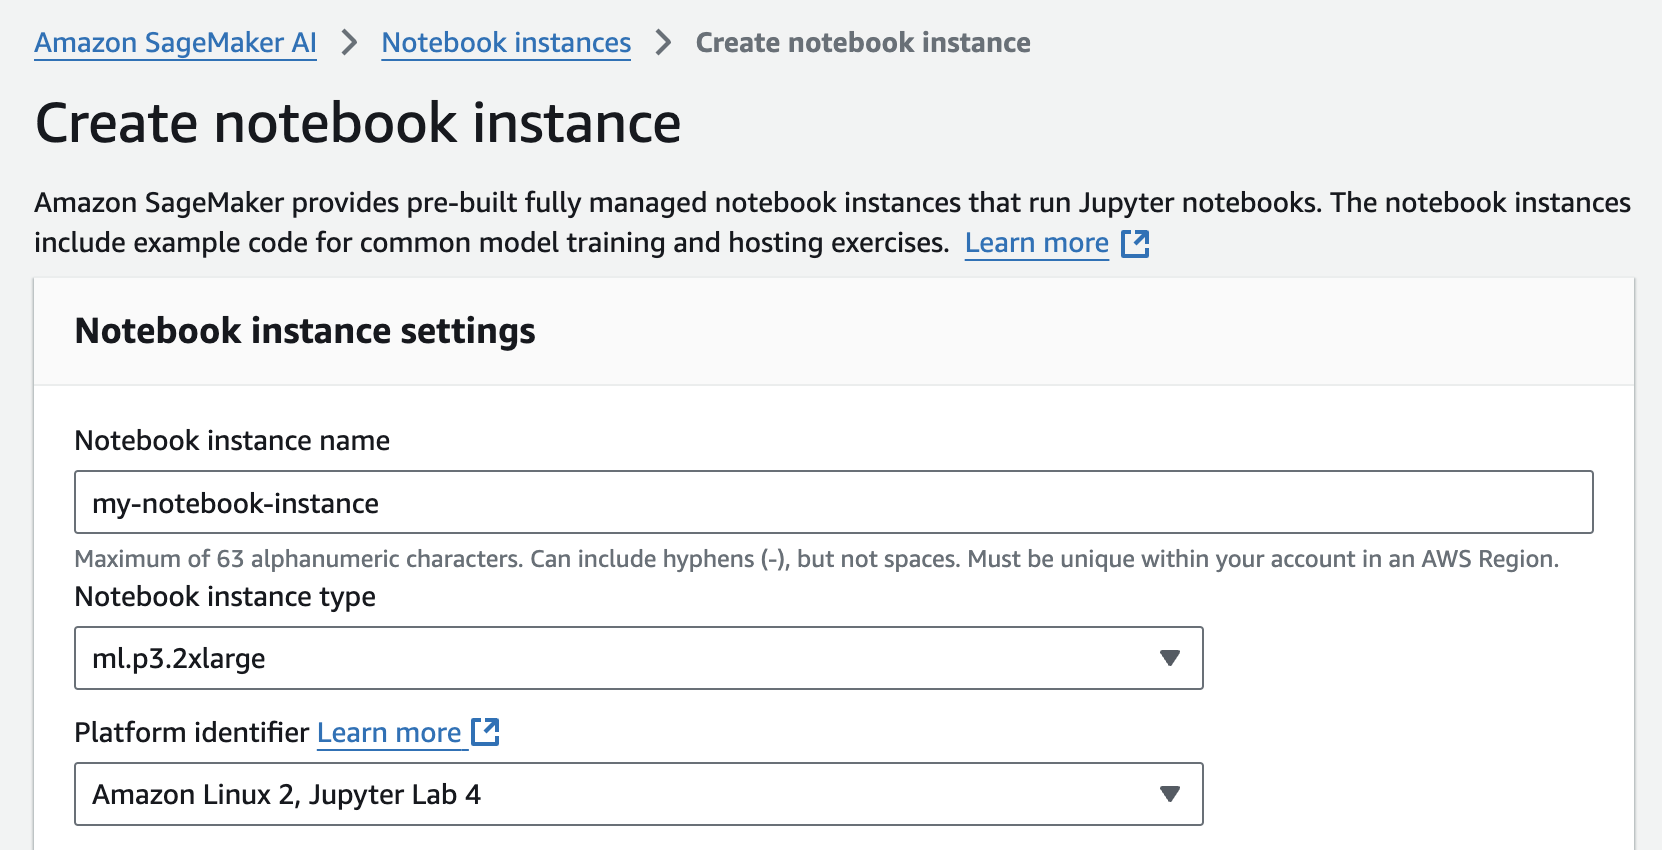
If a field is not mentioned below, leave the default values:
Notebook instance name = Name of the notebook instance
Notebook instance type = Type of notebook instance. Select a RAPIDS-compatible GPU (see the RAPIDS docs) as the SageMaker Notebook instance type (e.g.,
ml.g6.xlarge).Platform identifier = ‘Amazon Linux 2023, Jupyter Lab 4’
Create a RAPIDS lifecycle configuration#
SageMaker Notebook Instances can be augmented with a RAPIDS conda environment.
We can add a RAPIDS conda environment to the set of Jupyter ipython kernels available in our SageMaker notebook instance by installing in a lifecycle configuration script.
Create a new lifecycle configuration (via the ‘Additional Configuration’ dropdown).
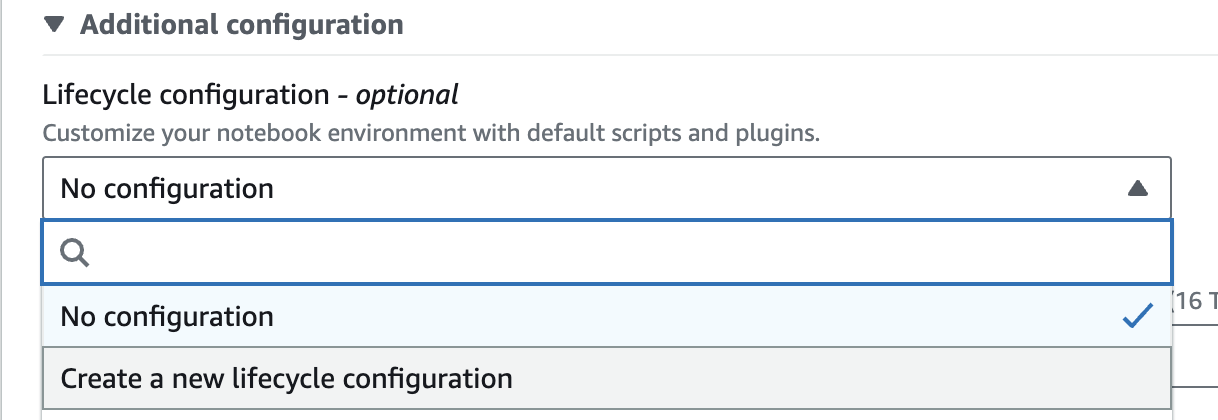
Give your configuration a name like rapids and paste the following script into the “start notebook” script.
#!/bin/bash

set -e

sudo -u ec2-user -i <<'EOF'

eval "$(conda shell.bash hook)"

conda create -y -n rapids -c rapidsai -c conda-forge rapids=26.06 python=3.12 cuda-version=13 boto3 ipykernel sagemaker-python-sdk
conda activate rapids

python -m ipykernel install --user --name rapids --env CONDA_PREFIX "$CONDA_PREFIX"
echo "kernel install completed"
EOF
Set the volume size to at least 15GB, to accommodate the conda environment.
Then launch the instance.
Select the RAPIDS environment#
Once your Notebook Instance is InService select “Open JupyterLab”
Note
If you see Pending to the right of the notebook instance in the Status column, your notebook is still being created. The status will change to InService when the notebook is ready for use.
Then in Jupyter select the rapids kernel when working with a new notebook.

Run the Example Notebook#
Once inside JupyterLab you should be able to upload the Running RAPIDS hyperparameter experiments at scale example notebook and continue following those instructions.
SageMaker AI Estimators#
RAPIDS can also be used in SageMaker Estimators. Estimators allow you to launch training jobs on ephemeral VMs which SageMaker manages for you. With this option, your Notebook Instance doesn’t need to have a GPU… you are only charged for GPU instances for the time that your training job is running.
All you’ll need to do is bring in your RAPIDS training script and libraries as a Docker container image and ask Amazon SageMaker to run copies of it in parallel on a specified number of GPU instances.
Let’s take a closer look at how this works through a step-by-step approach:
Training script should accept hyperparameters as command line arguments. Starting with the base RAPIDS container (pulled from Docker Hub), use a
Dockerfileto augment it by copying your training code and setWORKDIRpath to the code.Install sagemaker-training toolkit to make the container compatible with Sagemaker. Add other packages as needed for your workflow needs e.g. python, flask (model serving), dask-ml etc.
Push the image to a container registry (ECR).
Having built our container and custom logic, we can now assemble all components into an Estimator. We can now test the Estimator and run parallel hyperparameter optimization tuning jobs.
Estimators follow an API roughly like this:
# set up configuration for the estimator
estimator = sagemaker.estimator.Estimator(
    image_uri,
    role,
    instance_type,
    instance_count,
    input_mode,
    output_path,
    use_spot_instances,
    max_run=86400,
    sagemaker_session,
)

# launch a single remote training job
estimator.fit(inputs=s3_data_input, job_name=job_name)

# set up configuration for HyperparameterTuner
hpo = sagemaker.tuner.HyperparameterTuner(
    estimator,
    metric_definitions,
    objective_metric_name,
    objective_type="Maximize",
    hyperparameter_ranges,
    strategy,
    max_jobs,
    max_parallel_jobs,
)

# launch multiple training jobs (one per combination of hyperparameters)
hpo.fit(inputs=s3_data_input, job_name=tuning_job_name, wait=True, logs="All")
For a hands-on demo of this, try [“Deep Dive into running Hyper Parameter Optimization on AWS SageMaker”]/examples/rapids-sagemaker-higgs/notebook).
Further reading#
We’ve also written a detailed blog post on how to use SageMaker with RAPIDS.