NVIDIA Brev#
The NVIDIA Brev platform provides you a one stop menu of available GPU instances across many cloud providers, including Amazon Web Services and Google Cloud, with CUDA, Python, Jupyter Lab, all set up.
Brev Instance Setup#
There are two options to get you up and running with RAPIDS in a few steps, thanks to the Brev RAPIDS quickstart:
Brev GPU Environments - quickly get the GPU, across most clouds, to get your work done.
Brev Launchables - quickly create one-click starting, reusable instances that you customized to your MLOps needs.
Option 1. Setting up your Brev GPU Environment#
Navigate to the Brev and click on “Create Environment”.

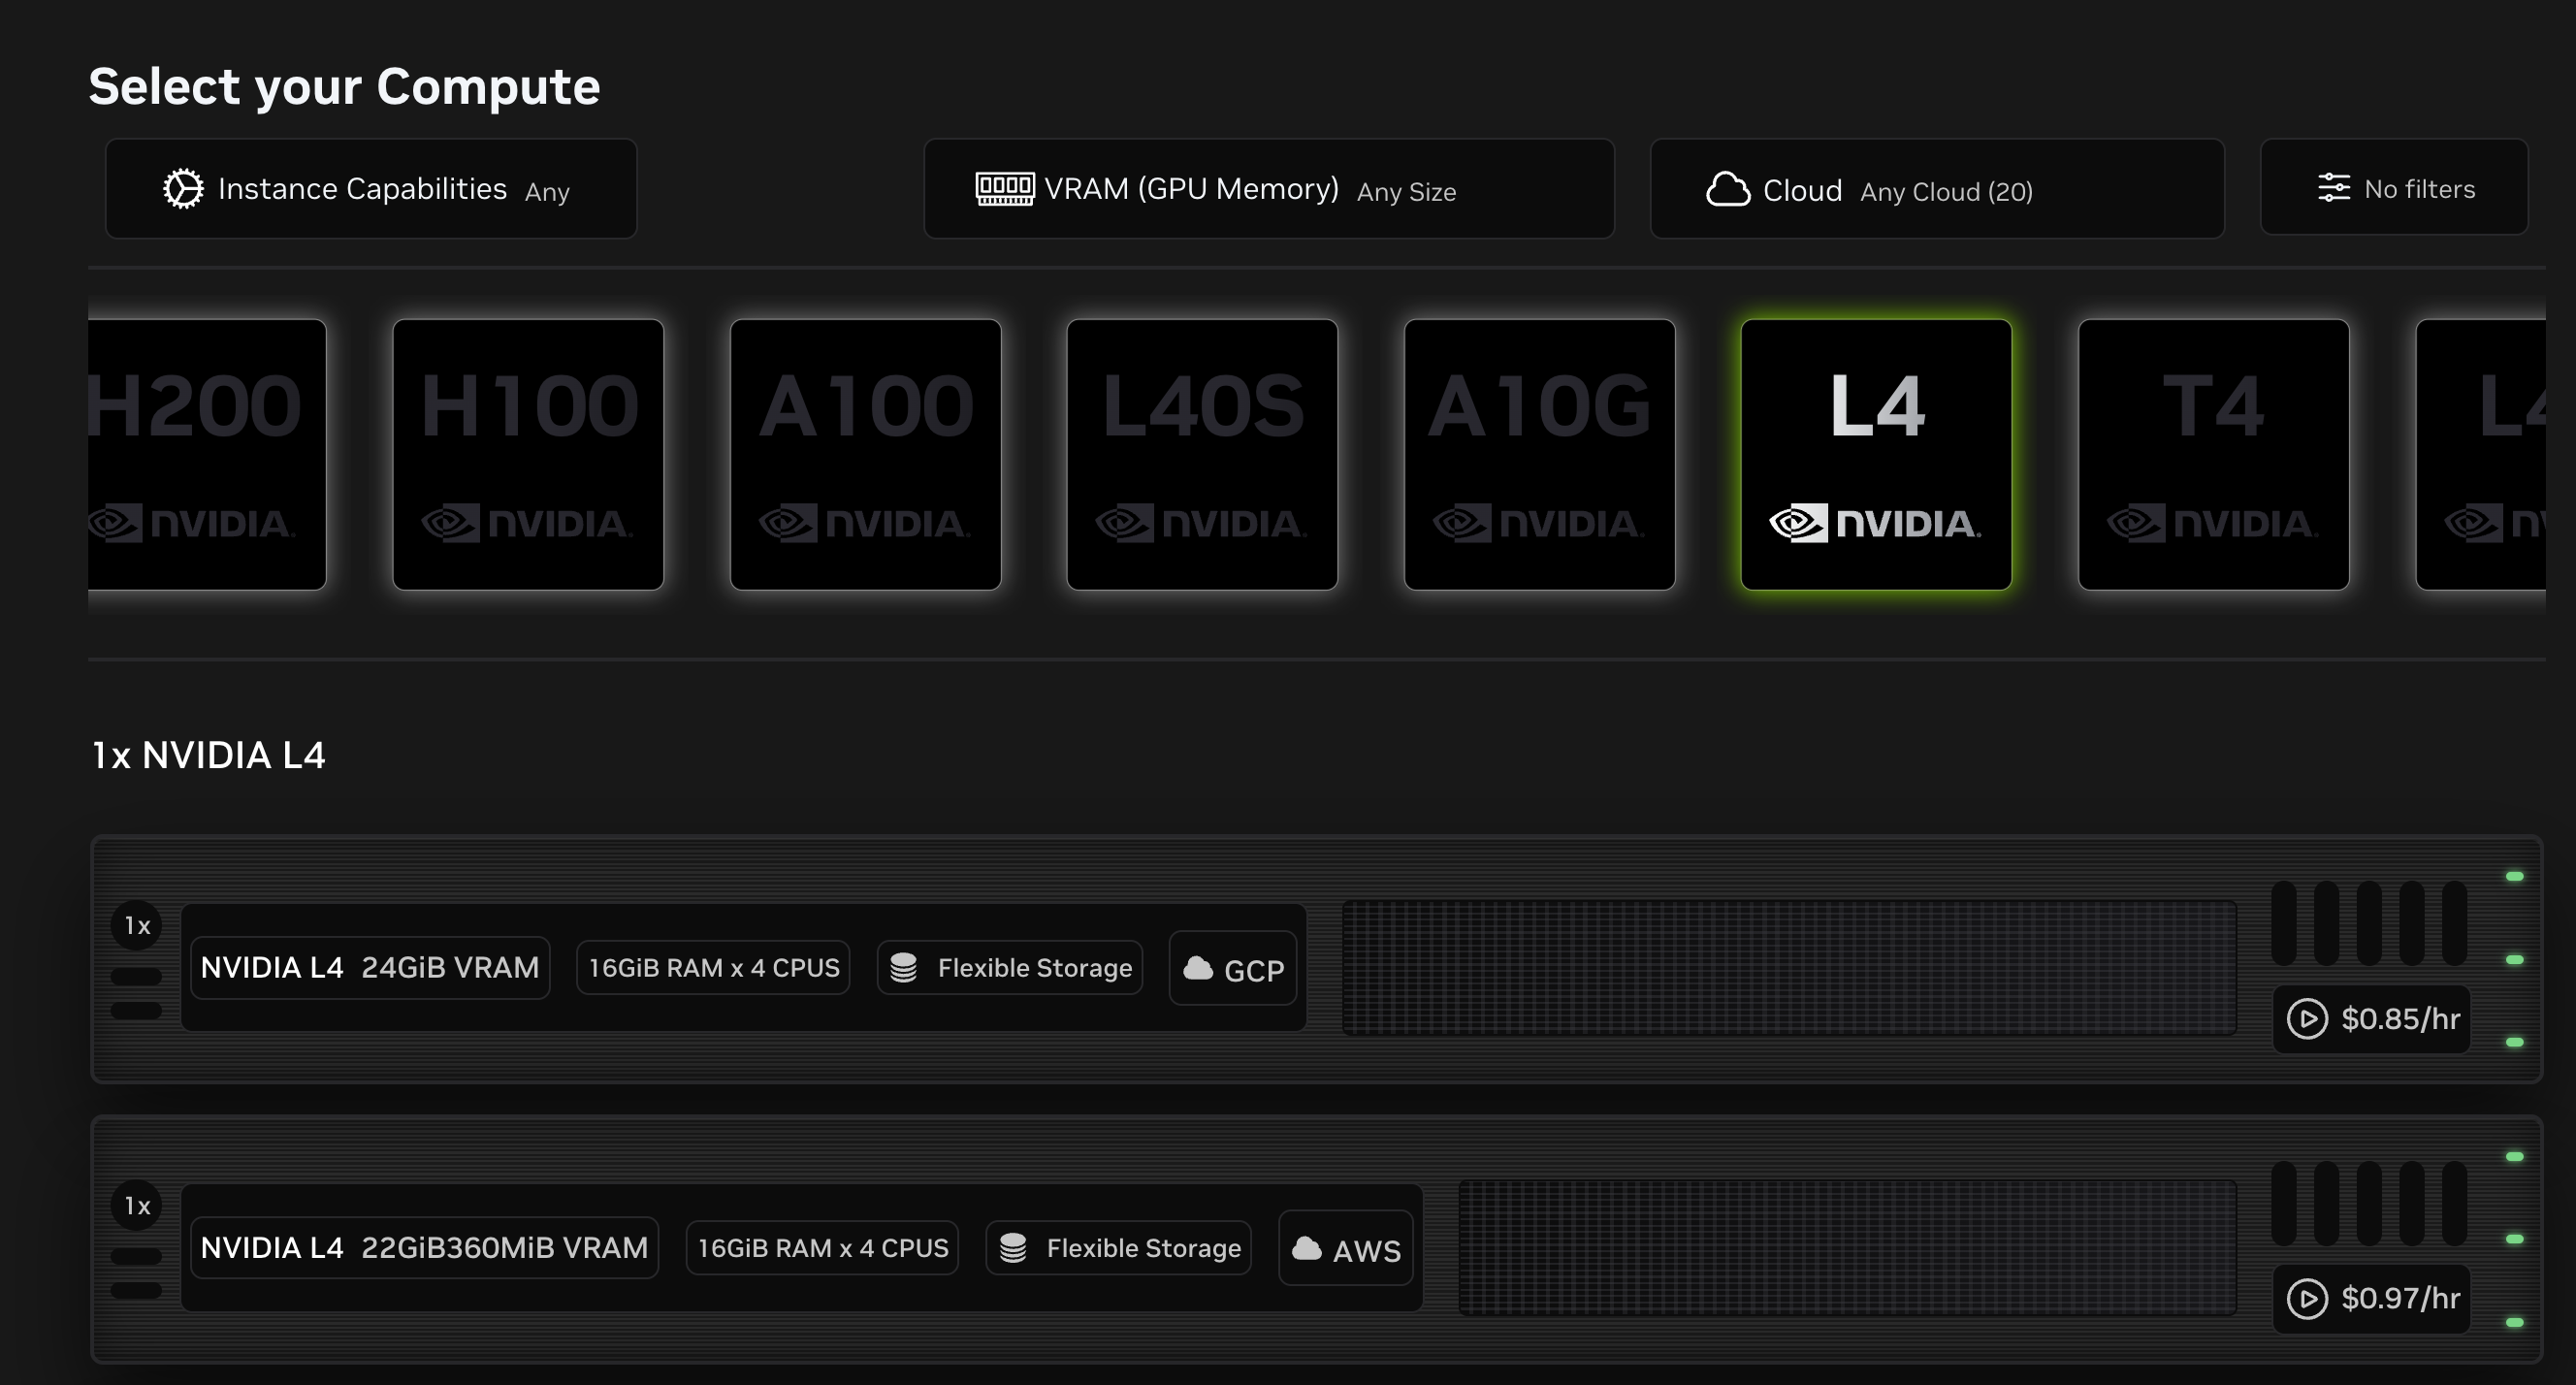
Choose a compute type.
Hint
New users commonly choose L4 GPUs for trying things out.
Select the “Edit” button to change the software configuration container or runtime (the default is “VM Mode w/ Jupyter”)
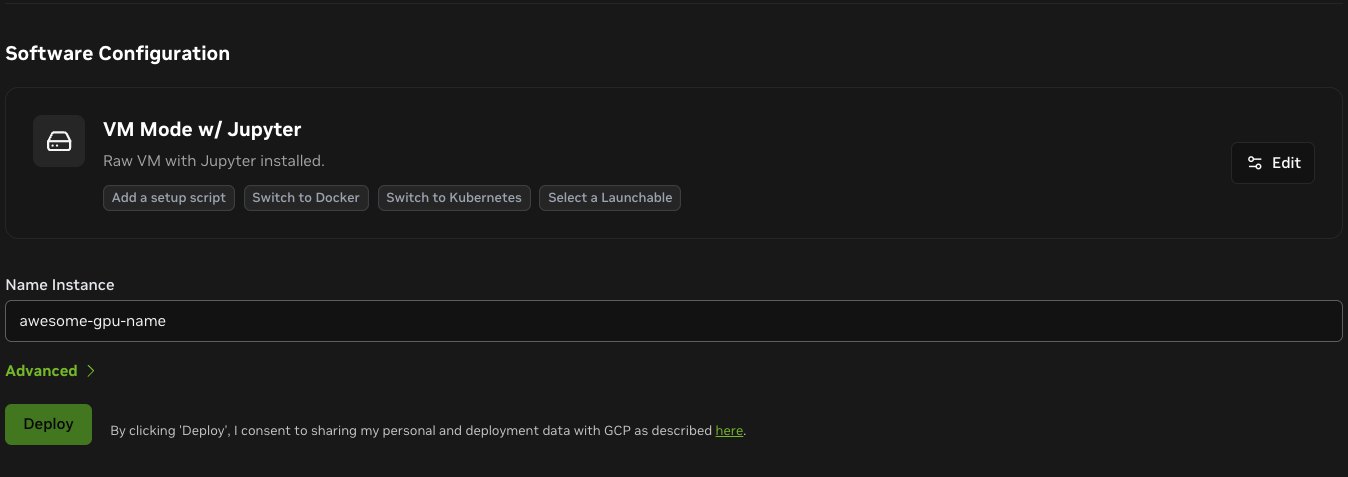
Select “Single Container”, choose the RAPIDS release, python and CUDA versions, under the “NVIDIA RAPIDS” Container selector and hit “Apply”.

Give your instance a name and hit “Deploy”.
Option 2. Setting up your Brev Launchable#
Brev Launchables are shareable environment configurations that combine code, containers, and compute into a single portable recipe. This option is most applicable if you want to set up a custom environment for a blueprint, like our Single-cell Analysis Blueprint. However, you can use this to create quick-start templates for many different kinds of projects when you want users to drop into an environment that is ready to go (e.g. tutorials, workshops, demos, etc.).
You can read more about Brev Launchables in the Getting Started Guide.
Go to Brev’s Launchable Creator (requires account)
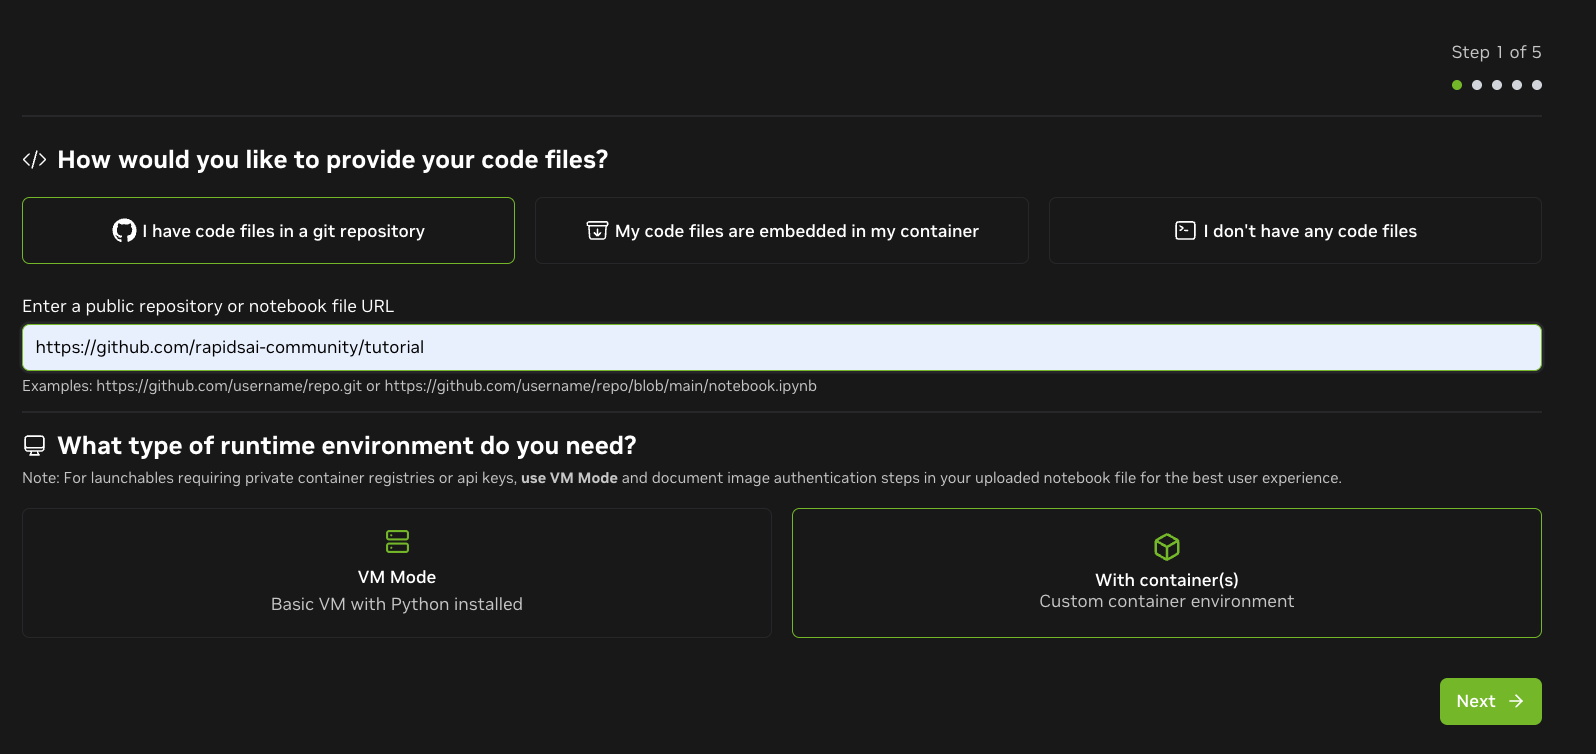
When asked How would you like to provide your code files?.
Select “I have code files in a git repository”, and provide the link to a GitHub repository, if you have one that you’d like to be mounted in the instance once is up.
Otherwise, select “I don’t have any code files”.
When asked What type of runtime environment do you need? select “With container(s)”, and proceed.
When prompted to Choose a Container Configuration, you have two options:
“Featured Container” and select the “NVIDIA RAPIDS” container: For a ready to go environment with the entire RAPIDS stack and Jupyter configured.
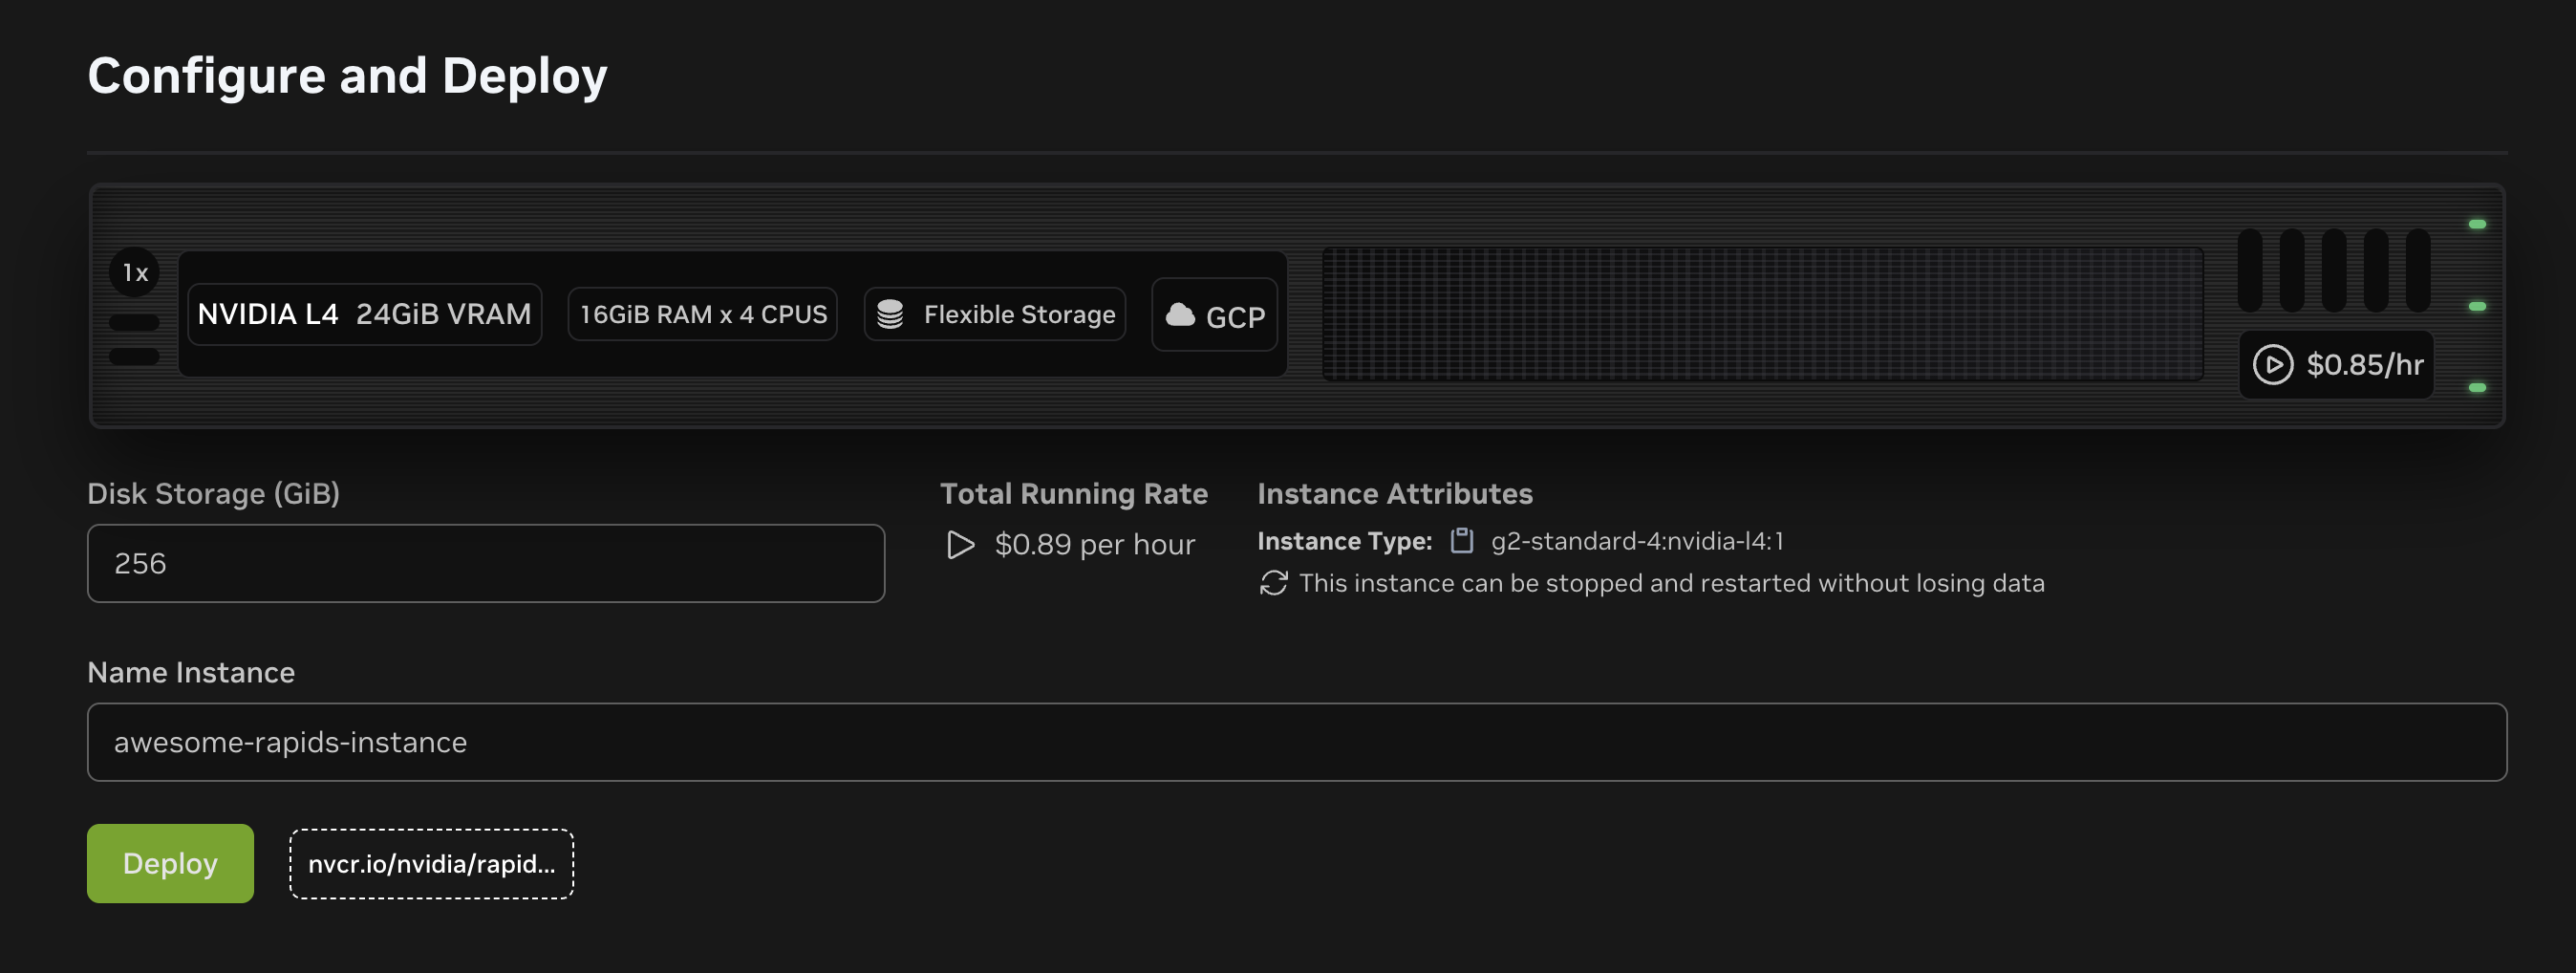
Select your desired compute environment. Make sure you select sufficient disk size to download the datasets you want to work with. Note, you will not be able to resize the instance once created.
Create a name for your launchable, and deploy.
Docker Compose: For a custom container that you can tailor to your needs.
You can provide a
docker-compose.yamlvia url o from a local file. In the following template, make sure to replace<name_of_your_github_repo>in thevolumespath, with the name of your repository if you have one. Otherwise, remove thevolumesentry.
services:
backend:
   image: "nvcr.io/nvidia/rapidsai/notebooks:26.06-cuda12-py3.13"
   pull_policy: always
   ulimits:
      memlock: -1
      stack: 67108864
   shm_size: 1g
   deploy:
      resources:
      reservations:
         devices:
            - driver: nvidia
            count: all
            capabilities: [gpu]
   environment:
      EXTRA_CONDA_PACKAGES: "hdbscan>=0.8.39 umap-learn>=0.5.7" # example of packages
   ports:
      - "8888:8888"      # Expose JupyterLab
   volumes:
      - /home/ubuntu/<name_of_your_github_repo>:/notebooks/ # e.g tutorial if repo at https://github.com/rapidsai-community/tutorial
   user: root
   working_dir: /notebooks
   entrypoint: ["/home/rapids/entrypoint.sh"]
   command: python -m jupyter lab --allow-root --ip=127.0.0.1 --no-browser --NotebookApp.token='' --NotebookApp.password='' --notebook-dir=/notebooks
   restart: unless-stopped
Click “Validate”.
Select your desired compute environment. Make sure you select sufficient disk size to download the datasets you want to work with. Note, you will not be able to resize the instance once created.
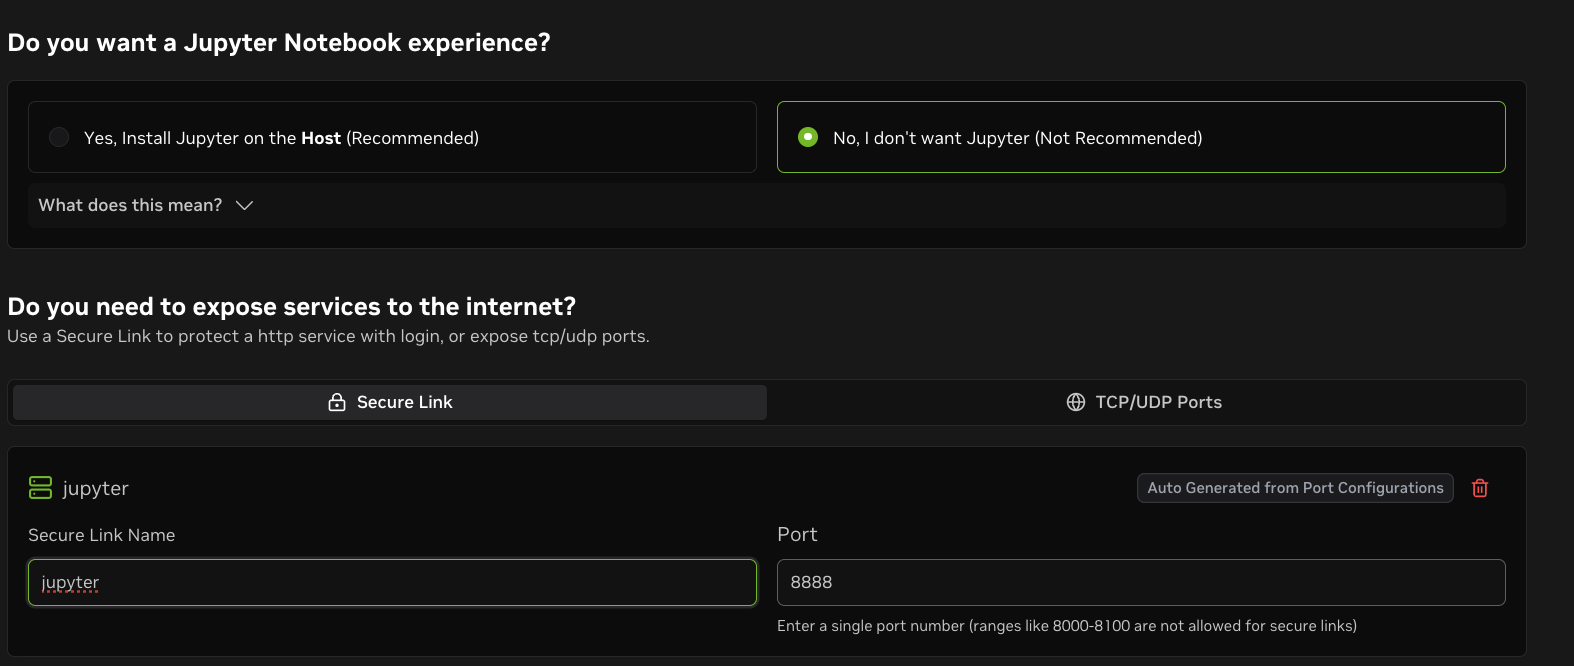
On the next page, when asked Do you want a Jupyter Notebook experience? select No, I don’t want Jupyter. This is because the RAPIDS notebook container already have Jupyter setup. For convenience name the Secure Link to jupyter.
Create a name for your launchable, and deploy.
Accessing your instance#
There are a few ways to access your instance:
Directly access Jupyter Lab from the Brev GUI
Using the Brev CLI to connect to your instance….
Using Visual Studio Code
Using SSH via your terminal
Access using the Brev tunnel
Sharing a service with others
1. Jupyter Notebook#
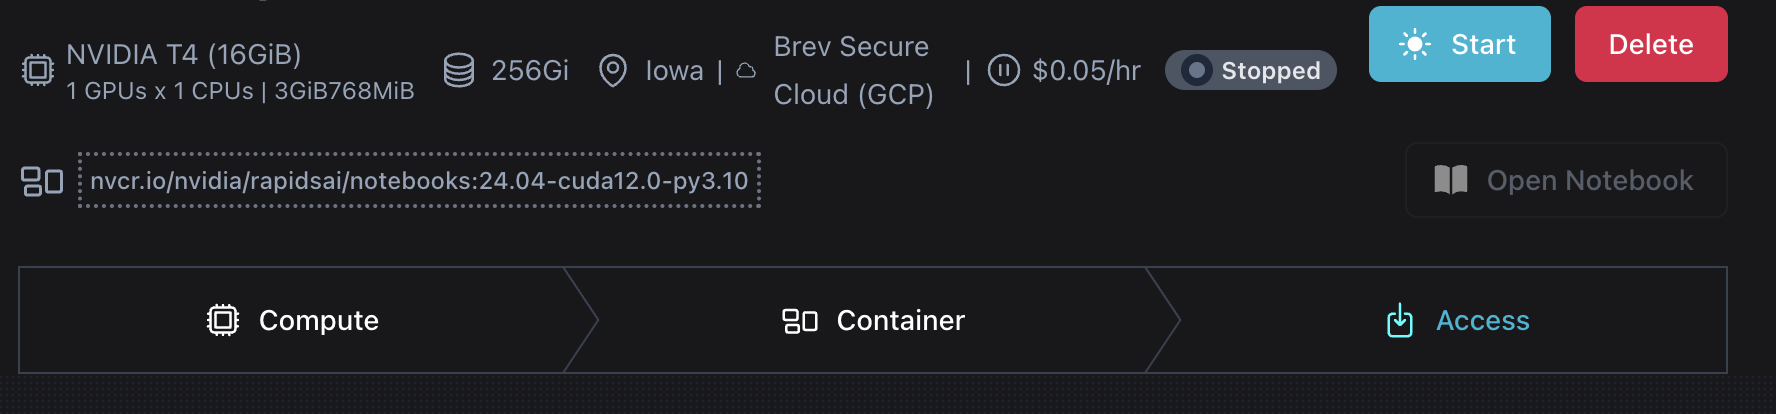
To create and use a Jupyter Notebook, click “Open Notebook” at the top right after the page has deployed.
2. Brev CLI Install#
If you want to access your launched Brev instance(s) via Visual Studio Code or SSH using terminal, you need to install the Brev CLI according to these instructions or this code below:
$ sudo bash -c "$(curl -fsSL https://raw.githubusercontent.com/brevdev/brev-cli/main/bin/install-latest.sh)" && brev login
2.1 Brev CLI using Visual Studio Code#
To connect to your Brev instance from VS Code open a new VS Code window and run:
$ brev open <instance-id>
It will automatically open a new VS Code window for you to use with RAPIDS.
2.2 Brev CLI using SSH via your Terminal#
To access your Brev instance from the terminal run:
$ brev shell <instance-id>
Forwarding a Port Locally#
Assuming your Jupyter Notebook is running on port 8888 in your Brev environment, you can forward this port to your local machine using the following SSH command:
$ ssh -L 8888:localhost:8888 <username>@<ip> -p 22
This command forwards port 8888 on your local machine to port 8888 on the remote Brev environment.
Or for port 2222 (default port).
$ ssh <username>@<ip> -p 2222
Replace username with your username and ip with the ip listed if it’s different.
Accessing the Service#
After running the command, open your web browser and navigate to your local host. You will be able to access the Jupyter Notebook running in your Brev environment as if it were running locally.
3. Access the Jupyter Notebook via the Tunnel#
The “Deployments” section will show that your Jupyter Notebook is running on port 8888, and it is accessible via a shareable URL Ex: jupyter0-i55ymhsr8.brevlab.com.
Click on the link or copy and paste the URL into your web browser’s address bar to access the Jupyter Notebook interface directly.
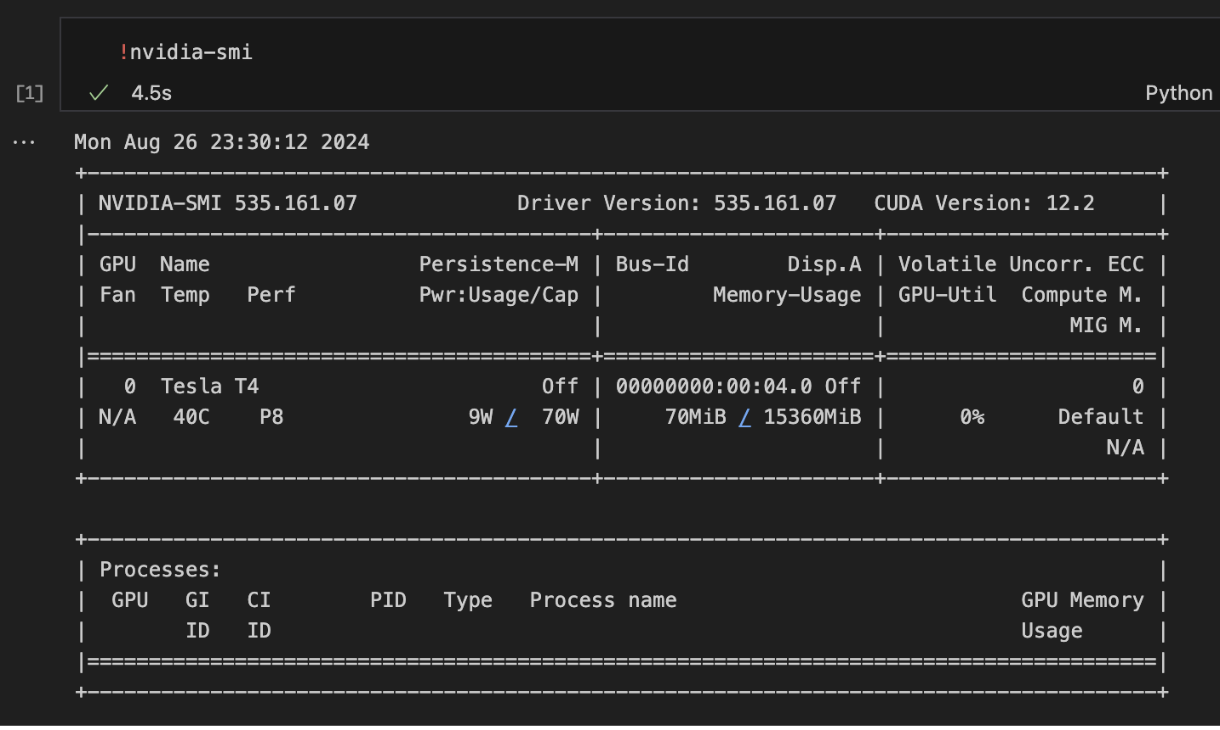
Check that your notebook has GPU Capabilities#
You can verify that you have your requested GPU by running the nvidia-smi command.
Testing your RAPIDS Instance#
You can verify your RAPIDS installation is working by importing cudf and creating a GPU dataframe.
import cudf

gdf = cudf.DataFrame({"a": [1, 2, 3], "b": [4, 5, 6]})
print(gdf)
Resources and tips#
Please note: Git is not preinstalled in the RAPIDS container, but can be installed into the container when it is running using
$ apt update
$ apt install git -y